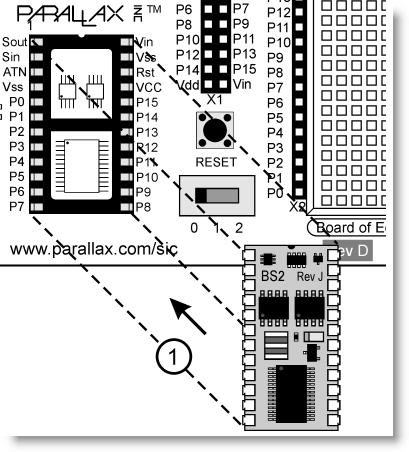
Insert the BASIC Stamp module
- Use the silkscreen pictures that show the three prominent chips on the BASIC Stamp to determine how to orient it before inserting it into its socket. There is also a small semi-circular notch at in the top-center of the BASIC Stamp module that indicates which way is “up.” Match this reference notch to the notch in the socket.
- After correctly orienting the 24-pin BASIC Stamp module, gently insert it into its socket as shown at (1) in the picture below.
- Make sure that each pin is seated in its corresponding socket hole, then apply firm downward pressure with your thumb. The module should sink about ¼ of an inch (~0.6 mm) into the socket, and only the flared portion of each BASIC Stamp leg should be visible above the socket.
- Visually inspect the legs to make sure each pin is in its socket and that no pins are folded underneath the module.

Caution! Do not remove the BASIC Stamp module from its socket, unless it needs to be replaced with another module! Every time the BASIC Stamp is removed and re-inserted into the socket, you risk damaging it. You do not need to remove it for storage.

